
Table of Contents
- Why Previewing Personalized Gift Designs Matters
- Personalized Gift Design Tools: What to Expect
- How to Ensure High Resolution for Custom Prints
- Step-by-Step: How to Preview Your Custom Gift Design
- Common Mistakes in Custom Gift Ordering
- Troubleshooting Preview Errors and Mobile vs. Desktop Differences
- Conclusion: From Preview to Perfect Gift
- Frequently Asked Questions
Last Updated: September 27, 2026
Why Previewing Personalized Gift Designs Matters
Previewing personalized gift designs is the step that separates a keepsake from a regret. It shows you exactly how your photo, name, or message will sit on the finished item before anyone prints it. Skip that step, and you risk a gift that looks nothing like what you pictured.
Most people shop on a phone, in a hurry, late at night.
That is exactly when mistakes happen. A cropped face. A name spelled wrong. A photo too small to print well. A quick look at the preview catches all three.
The Federal Trade Commission's guidance on online shopping reminds buyers to review order details before checkout, and personalized items usually cannot be returned once printed. That makes the preview your last line of defense.
Here is what this guide covers: how design tools work, how to check image quality, a step-by-step preview walkthrough, and fixes for the errors that trip people up.
Personalized Gift Design Tools: What to Expect
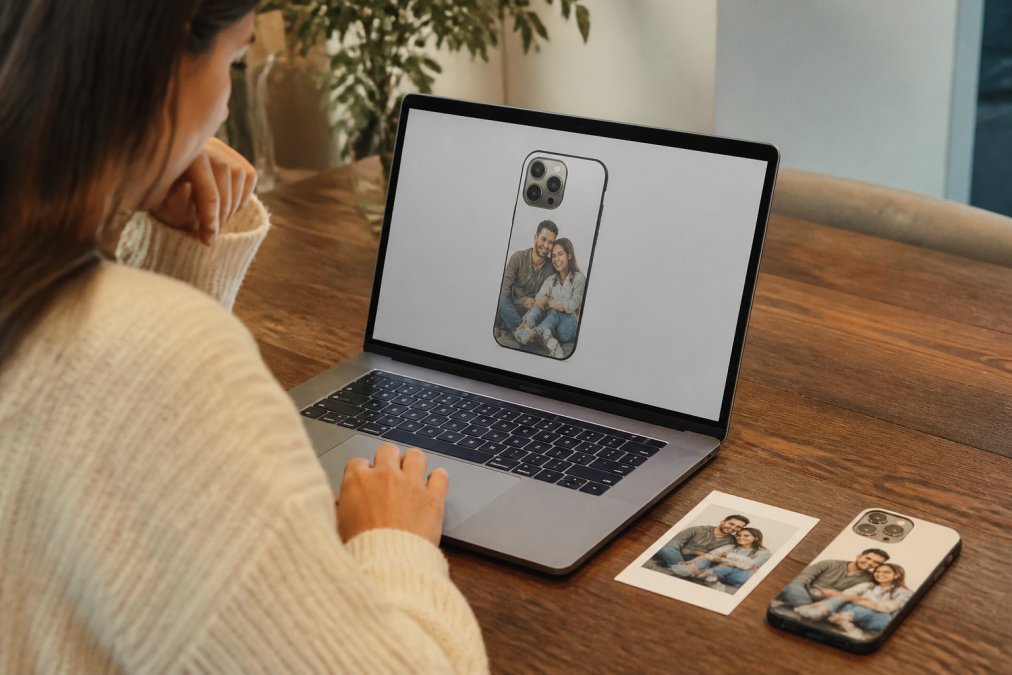
Most personalized gift design tools work the same way. You pick a product, upload a photo, and adjust it inside a visual editor. The preview updates as you type, which is called real-time preview.
Expect these common features:
- Drag-and-drop layout for moving photos and text
- Templates for mugs, phone cases, and prints
- Photo upload from your phone or computer
- Live mockup showing the design on the actual product
- Zoom tools for checking small details
How to Judge Whether a Preview Tool Is Trustworthy
Not every editor is built the same. Before you invest time in a design, run this five-point check. It separates a tool that protects you from one that just looks polished.
- Does it show a true print-area outline? A trustworthy editor draws the actual printable zone, including the bleed area, so you can see what falls outside the cut line. If the tool only shows a floating mockup with no boundary, you are guessing.
- Does the preview render at print resolution? Zoom to 100% and look at a fine detail, like an eyelash or a thin font stroke. If it turns soft or blocky on screen, the tool is showing you a low-resolution placeholder, not the file that will print.
- Does it flag low-resolution uploads automatically? Good tools warn you when a photo is too small for the chosen product size. Tools that stay silent push the risk onto you.
- Does it preserve your original file? Some editors compress uploads to speed up the site. That compression can degrade the print file. Look for language confirming the original resolution is retained.
- Does it give you a downloadable or screenshot-able proof? You want a record of exactly what you approved. If the tool hides the final proof behind checkout, you lose your reference point.
Desktop vs. Mobile: The Same Tool, Two Different Experiences
Most people design on a phone, but most editors were built for a desktop browser first. That mismatch causes real errors.
On a phone, the canvas is small, so fine text and thin borders are hard to judge. Touch targets for dragging and resizing are imprecise, which makes it easy to nudge a photo a few pixels off-center without noticing. Text boxes may reflow differently because the on-screen keyboard covers part of the canvas.
A practical workflow is to start the design on whichever device you have, then do the final review on the other one if you can. If you only have a phone, rotate between portrait and landscape to see how the layout shifts, and pinch-zoom to 100% on each corner of the design. If you only have a desktop, resize your browser window narrower to simulate a small screen and watch for text wrap changes.
Accessibility: Designing So Everyone Can Review It
Accessibility in design tools is a gap almost no guide covers, yet it affects both the person designing and the person receiving the gift.
For the gift itself, the Web Content Accessibility Guidelines recommend clear contrast between text and background. That advice applies directly to your design. Light text on a light photo disappears for anyone with reduced contrast sensitivity, and it will also print faintly.
How to Ensure High Resolution for Custom Prints
High resolution for custom prints comes down to one number: pixels per inch, or DPI. Print shops want 300 DPI at the final print size. Below that, images look soft. Below 150 DPI, they look pixelated.
Here is how to check yours:
Personalized Photo Name Phone Case →
- Open the photo on your computer.
- Right-click and choose "Properties" or "Get Info."
- Look at the pixel dimensions (for example, 3000 x 2400).
- Divide each number by 300 to get the largest print size in inches.
Watch for these warning signs:
- Blurry edges when you zoom in
- Visible squares (pixelation)
- Washed-out colors
- Screenshots instead of original files
The Color Gap: Why Your Preview Looks Brighter Than the Print
This is the part most guides skip, and it is the reason a gift can arrive looking "off" even when the resolution is perfect.
A few habits close that gap:
- Avoid the most saturated colors. If a color looks like it is glowing on screen, expect it to flatten in print.
- Do not rely on screen brightness. Turn your phone or monitor brightness to about half before judging color. A screen at full brightness lies to you.
- Ask about soft proofing. Some editors offer a soft proof, which simulates the CMYK print result on your screen. If the tool has it, use it. If it does not, ask customer service for a physical or digital proof when color is critical.
- Request a digital proof for anything color-sensitive. Logos, team colors, and matching a specific outfit are the cases where a few shades of difference matter most.
Resolution and Color Are Two Separate Checks
A common mistake is fixing one and assuming the other is fine. A photo can be razor-sharp at 300 DPI and still print with disappointing color. It can also have beautiful, accurate color and still print soft because the file was too small.
Run both checks before you approve any proof:
- Confirm the pixel dimensions support the print size.
- Confirm the colors are not relying on screen-only brightness.
Step-by-Step: How to Preview Your Custom Gift Design
Follow these steps to preview personalized gift designs the right way.
Common Mistakes in Custom Gift Ordering
The most common mistakes in custom gift ordering are avoidable with a two-minute check. Here are the ones that show up again and again.
| Mistake | What Happens | The Fix |
|---|---|---|
| Low-resolution photo | Blurry or pixelated print | Use a file of 1 MB or larger |
| Wrong aspect ratio | Stretched or cropped faces | Match photo shape to template |
| Typos in names | Printed error, no refund | Read text out loud before ordering |
| Ignoring the bleed area | Edges cut off in production | Keep key details away from edges |
| Skipping the digital proof | Surprise result on arrival | Always approve the proof |
| Ordering too late | Missed occasion | Check production and shipping times |
Troubleshooting Preview Errors and Mobile vs. Desktop Differences
Preview errors usually come from the file, not the tool. If your image will not load, it is often too large or in the wrong format. JPG and PNG work on most sites. HEIC files from iPhones sometimes fail.
Try these fixes:
- Convert HEIC to JPG before uploading
- Shrink files over 20 MB
- Disable your ad blocker if the editor will not load
- Clear your browser cache and reload
- Switch browsers if the preview still freezes
Conclusion: From Preview to Perfect Gift
A good preview turns a risky purchase into a confident one. Check resolution, watch the bleed area, read your text twice, and view the proof on more than one device. Those four habits prevent almost every custom gift disaster.
Frequently Asked Questions
Why is it important to preview a personalized gift design before ordering?
Previewing lets you catch issues like low resolution, poor cropping, or color shifts before the item is printed. A digital proof shows exactly how your photo or text will sit on the final product, so you can adjust the layout, zoom, or bleed area. Skipping this step often leads to pixelated prints or awkward framing that ruins the sentimental value. Always review the mockup at full size and check the resolution warning if the tool provides one.
What should I look for when reviewing a digital gift mockup?
Check three things: image quality (no blur or pixelation), color accuracy (does the preview match your original photo?), and placement (is the subject centered and within the safe zone?). Also confirm that any text is spelled correctly and that the font size is readable. If the tool offers a zoom feature, use it to inspect edges. For photo gifts like a custom phone case, ensure the crop does not cut off faces or important details.
Can I change my design after previewing it on a website?
Most reputable platforms let you edit and re-preview as many times as needed before you add the item to your cart. Once you place the order, changes are usually locked because production starts quickly. If you notice a mistake after ordering, contact customer service immediately; some brands can adjust the file if production has not begun. Always save a screenshot of your final preview for your records.
How do real-time preview tools work for custom products?
Real-time preview tools use a visual editor that overlays your uploaded photo or text onto a product template. As you drag, resize, or rotate elements, the mockup updates instantly to show the result. Some tools also simulate lighting and texture so you can see how a glossy or matte finish will look. The preview is a digital proof, not a guarantee, so double-check the resolution and color profile of your original file before uploading.